Friday 29 June 2012

Holidays in a yurt in Wales


I never expected one of my most enjoyable holidays to date would be staged so close to home - 3.5 hour ferry from Rosslare to Fishguard followed by ten days exploring the Welsh countryside.
Night one was an impromptu stay in Cardiff on our way to Bristol (England I know but it was necessary to cross borders to see the glorious Jesca Hoop in concert). In Bristol, stayed in these excellent apartments in a multi cultural area with lots of interesting people and shops. Malik’s foodstore across the road provided lots of great fresh fruit and veg. 
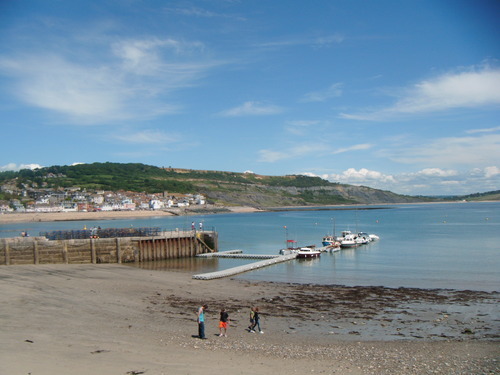
While in the Bristol area, we seized the opportunity to drive down to Axminster to visit the River Cottage canteen for lunch. Had a fabulous meal of Fregola with asparagus, mushroom and some other little interesting veg that I had never eaten before, washed down with a bottle of Stinger Ale. Also stopped by for a look at Lyme Regis, a most beautiful seaside holiday town, full of ice cream and old people.
Back across the Severn Bridge for our next destination, which was our most anticipated:  The Yurt Farm based in Crynfryn near Aberaeron.
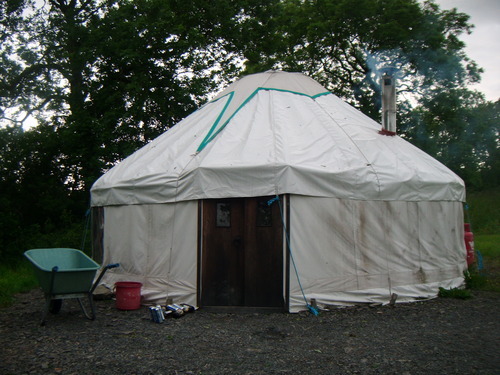
We had booked an 18ft yurt for three nights. As advised by the website, and a less than optimistic expectation of the Welsh weather (so similar to our own), we were armed with wellies and rain gear and it was well that we were, since it pissed rain relentlessly for the first twenty four hours of our stay. It didn’t bother us. Kitted out to suit the weather, we began to settle into our yurt, lighting the internal fire burning stove and preparing a dinner from the basket of new spuds and veg that was gifted to us from the yurt owners, supplemented with some lamb chops from their farm shop (run on an honest box system).
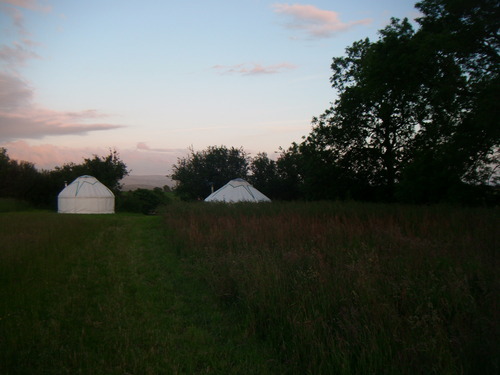
We were blown away by the farm. The layout is superb with communal facilities only a short walk from every yurt. The surrounding fields are lush meadows with beautiful wild flowers.
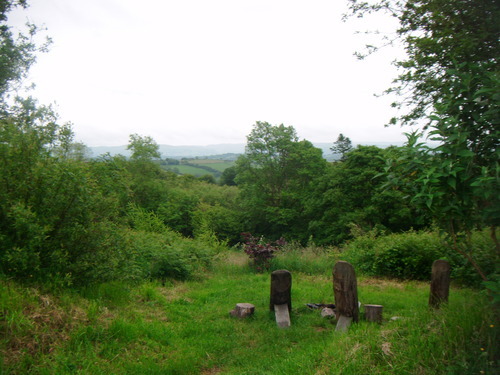
Hens roam freely and we frequently saw hawks and other large birds of prey flying overhead. Here is picture of the vista from outside our tent, a beautiful sight from the well crafted wooden seats:
Toilets are dry - basically you cannot flush them but they work on a composting premise using sawdust. Very comfortable, hygienic, fun and not smelly!
The showers are spacious and the water is hot (gas boiler backs up the solar power on cloudy days)
Yurts do not have electricity or running water but there is a lovely communal cabin with electricity points (worked off solar power, large sink and well stocked kitchen, table and chairs, armchair, wonderful library of books dealing with self sufficiency and eco living topics, and a hearty wood burning stove. I spent many hours perusing over their copy of The New Complete Guide to Self Sufficiency by John Seymour, informative, inspiring and at times, hilarious!
Despite sweltering blissfully all evening by the burning stove, at night the yurt is COLD, as we painfully discovered the first night. In the torrential rain, we were unable to carry our large blanket from the car as we had nothing to cover it with. BLACK BAGS everyone! BRING REFUSE BAGS! Light blankets were supplied but we underestimated how cold it would get once the fire had burned out.
But we were ready for it the next night! Bought a roll of bin liners for transporting the blanket, got two hot water bottles that were supplied by the farm and made sure the fire was packed up before we nodded off. Result was a toasty nights sleep.
A huge supply of chopped logs, kindling and fire lighters was generously available to us at no cost. 
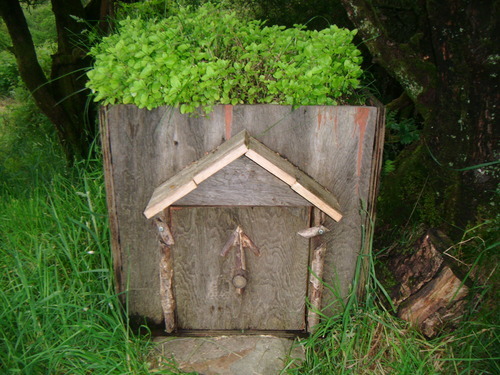
Yurts have a two ringed gas hob for cooking and are well stocked with good quality utensils, condiments and various teabags. Also provided is a handy lidded bucket for bringing water, a compost bucket for all your food waste and a rubber basin for bringing your dishes to the cabin. Outside was a hollow wooden box which I presume was the flower pot fridge! Worked a treat at keeping out beer cool:
What really impressed us about the yurt farm was the quality of the equipment supplied. The beds were strong, the saucepans were heavy, the knifes were sharp. Everything was top quality. Even something as simple (or maybe very important when you think about it) as having soft toilet paper instead of cheap stuff made all the difference. 
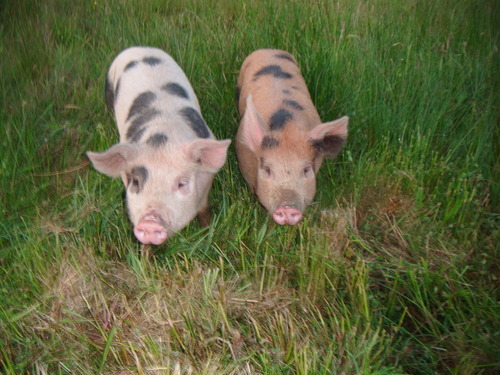
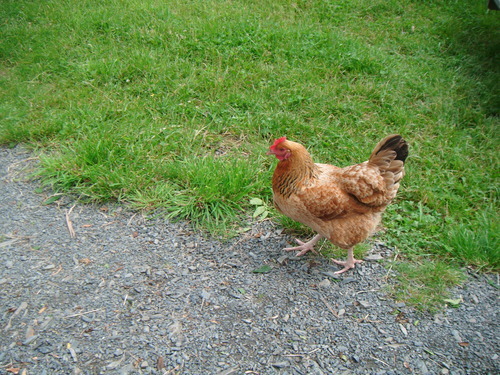
You could quite easily spend a fulfilling day without ever leaving the farm. Cook your breakfast on the hop, or even on the outside fire if the weather is good. Do some chores by carrying wear to the cabin or collecting firewood. Enjoy a cup of tea and read a book in the outside picnic table, or if the weather is bad, stretched on your bed in front of a blazing fire. Visit the pigs and chickens:
 
So everyone visit The Yurt Farm! It’ll make you a better person no doubt

Tuesday 12 June 2012

Homemade Tomato and Chili Relish


This relish was one of the first vaguely labour intensive foodie ventures I have undertaken - and it wasn’t difficult at all.


The original recipe comes from
here, although I alter it slightly each time. The recipe describes it as a jam, although I find the result definitely more relish-like.


Equipment needed:
Weighing scales
Knife
Chopping board
Pot
Wooden spoon
Sieve
Sterilised jars (done very easily by giving the jars a good wash and baking them in a low oven (gas 3) for ten minutes.

Ingredients:
2 red onions, finely chopped
400g/14oz ripe cherrytomatoes, halved
400g/14oz ripe plum tomatoes, quartered
3 large mild red chillies, deseeded, finely chopped
I sometimes add some green/red/yellow bell pepper for taste but more so for colour
5cm/2in piece fresh root ginger, grated
1 star anise
250ml/9fl oz white wine vinegar
300g/10½oz soft light brown sugar
2 tsp fish sauce (substitute soy sauce for vegetarians)


Method:

Heat the red onion and chopped tomatoes in a large heavy-based saucepan over a low heat. 

Add the chillies, ginger, star anise, vinegar and sugar. 

Bring the mixture to the boil, then simmer for about an hour. 

The original recipe states that the mix will thicken to allow you to draw a channel through it, but I find quite a bit of liquid is retained. 

You could drain this off and use it for other culinary wonders.


Add the fish sauce and cook for 2-3 more minutes, then spoon into sterilised jars.
For best results, allow to sit for a further two weeks.
I’ve given this relish for many gifts and it has always been a hit. It’s sweet taste is best enriched with strong cheddar cheese or strong dark meat.
*Personalised handmade stickers were bought in this eBay shop, and the labels were from a handy little pack bout in Lidl.

Sunday 10 June 2012

Card Making

Wedding Cards


image


Birthday Cards


image


Miscellaneous

image


image


Step by Step Photos: Brewing Elderflower Champagne

Elderflower is in season from end of May to June.


I'll always remember my first time brewing Elderflower Champagne. It wasn’t planned but I had been thinking about elderflower brews for a while but I wasn’t sure where to find the plant and what it looked like.  I had visions of trekking miles across fields and wasteland trying to find the illusive plant, when in actual fact, I found it three minutes from my house at the side of a very busy road. While walking, I spotted a plant that looked quite like the elderflower image I had in my mind, so I pulled off a piece. Walking on, I spotted another tree with similar flowers. The moment I picked it, I was almost certain I had the right flower. The smell was divine and I could just imagine consuming it. I brought it home, took a photo and uploaded it to a gardening forum requesting identification:


When I was satisfied it was the right plant, I sourced some right by my house, not near the road and headed to the shop to buy sugar and lemons for the brew.


I adapted this recipe from my ever-loved River Cottage show. The recipe admits that it sometimes causes "collateral damage", i.e. exploding bottles, but this can be totally avoided by leaving the brew for three weeks before bottling, as opposed to six days as directed by the recipe.

For once I could justify the collection of odds and ends at the side of the house, and pulled out a perfect bucket. I gave it a good soaking and cleaning, killing one little spider in my path (sorry little spider, I didn’t see you in time).


ELDERFLOWER CHAMPAGNE


Ingredients


3 litres of water (2l boiling, 1l cold)
350g sugar
Juice and zest of three small lemons
Tablespoon of white wine vinegar 
About 20 Elderflower heads


Directions:

Collect your elderflowers on a sunny day, preferably in the evening, when the scent and natural yeast in the flowers is at it's most potent.

Pick the best blooms, with mostly open flowers.

Give the elderflower a good shake to remove any insects but don't wash it. Using a scissors, remove as much of the green stem as possible.

Put the sugar into the bin.

Add the boiling water and stir with a clean, sterilised spoon to dissolve.

Add the cold water, lemon juice and vinegar.

Allow the mix to cool and then add the elderflower.

**Photo from another batch** showing the mix:


It's not much to look at now, at all but after three weeks covered with a clean muslin cloth and sitting in a cool, dark place the mix is darkened and frothy and smells gorgeous:


There may be some mould on top but that is no problem.

BOTTLING

You will need:

1 glass
1 measuring jug
A few squares of muslin
Empty clean bottles to make up 3 litres. I prefer simple plastic screw top bottles as you can open them slowly, thus avoiding blasting the liquid everywhere. However, if you want that effect use swing top glass bottles for a show stopping opening!

Fill your glass from the bucket. You will have a mix of liquid and flowers:


Cover the measuring jug with a piece of clean muslin and pour in the contents of the glass. The weight of the wet flowers may drag down the muslin so try to keep it taut:


Discard the spent flowers from the muslin before each fill.

Here is the filtered champagne ready for bottling:


Prime each bottle with a teaspoon of sugar before filling with liquid.

Ta da!

Leave the bottles to sit for a few days. It you squeeze the sides you will feel the pressure that has built up. It is now time to open and enjoy!
It's so simple. Do it.

Vegetable Growing 2012

Following moderate success with tomatoes and Chinese cabbage last year, I had vast plans of self-sufficiency for 2012. After watching one too many episodes of River Cottage coupled with doom filled day dreams of societal meltdown and the end of supermarkets, I pledged myself toward a garden abundant in food.

Phase one: invest in a greenhouse. And with the German efficiency we have become so familiar with, Lidl just happened to have a handy sized one in store for 49.99.


Following words of caution I received from online gardening forums, deeming it "the flyaway", I added extra secure straps and cement blocks on the base. It has survived almost four months, with plenty high winds to contend with.

First plants I set in March/April were:
Peas (mange tout)
Spinach
Lettuce
Pak choi
Tomatoes
Brussel Sprouts
Broccoli
Beetroot

I planted seeds in literally every container I could find, from pots to lunch boxes, empty plastic supermarket containers, fish boxes and window boxes. Great fun transplanting when they started to outgrow the containers...

Outside I planted carrots and onions in raised beds. Beetroot are in window boxes in front (leaves very tasty in salads)

I cheated with my strawberries, which I purchased as plants rather than seeds, but they are yielding a lovely consistent crop:


So far, I have been eating Pak Choi (although I have learned that they prefer cooler weather as they go to seed quickly, so I should have planted them outside - although I fear the slugs would have decimated them), mange tout, the odd strawberry, spinach and beetroot leaves. 

At the moment, I am most excited about my brussel sprouts as I have seen them growing before and they turn out to be a cool minature tree covered in sprouts. At the moment, mine are at the early leafy stage, but looking healthy. Its time to plant them in the big bad ground:


Problems faced:

FLIES in the greenhouse. Rotten flies of all different shapes, sizes and colours. I hung up a generic household fly catcher and it has tempted a few into its treacherous goo already so here's hoping for a full out fly genocide eventually.

SLUGS. I haven't done much about this yet but the plan is to lay jam jars filled with beer into the ground. Apparently they little feckers love the stuff. The reason I've put it off is that I don't really want to kill them but at least they will die happy and drunk.

A TENDENCY FOR OVER ZEALOUS PLANTING TO BEGIN WITH. Had to transplant a lot more than should have been necessary because I planted too many seeds at the beginning. When you look at that tiny little seed in your hand, you think "surely this cannot produce a big carrot all on its own, better add a few more". NO! I have been more sparse and restrained with my later planting and it is working out better. My greenhouse will look very different next year.