Tuesday, 6 May 2014

My Garden: 6th May 2014


There's lots to do in May but little to eat. For a few weeks I've been using spring onions from the garden but nothing else is edible at the moment. I am trying to stay motivated, looking back over posts from last year to remind myself why it is worth all the effort. My autumn planted onions and garlic will be the next things to harvest. Now that the chance of frost has passed, I must sow quick growing crops like radish. They don't provide much sustenance but plenty of satisfaction.


Last year I had great success with legumes, namely broad beans and mange tout. Broad beans were a particular joy to grow and eat as they are rarely available fresh in my local area. You can eat the young plant tips, the young pods whole and the older pods shelled to reveal the plump beans. A particularly memorable meal was in a creamy risotto with John Dory:


This year's plants are starting to flower and are looking strong and healthy. They were planted in early spring and I am curious to see the differences with last year's crop, which were autumn planted. This is said to be a more favourable practice as it helps avoid the black bean aphid. My plants were infested with the aphid eventually but by that stage my crop was almost finished so I had few casualties. I hope I don't suffer because of my later planting this year. A glance back to last year's post around this time shows that my first beans had sprouted. This year, the flowers are just getting established.


My second round of brassica seedlings are doing well outdoors. I've realised that I may have over planted purple sprouting broccoli (eleven plants eeek) but luckily it's a versatile and delicious veg that will freeze well. It is also somewhat rarely seen around these parts so maybe I can offload some if I pluck up the courage to try and sell it.


I eat a lot of cherry tomatoes and I've discovered that the little pots I buy them in are excellent for potting on little seedlings. They have drainage holes in the bottom.


A leek seedling is borne (planted 16th of April):


And here are some that were planted on the 28th of February:


James Scarlet Intermediate carrot seedlings planted on the 15th of April:


And Early Nantes carrots planted on the 15th of March:


I never have much success planting salad leaves directly into the ground because apart from spinach, I can never tell the seedlings from the weeds, and the slugs devour most anyway. This year I am using a large hard plastic fish box (the kind trawlers use) for spinach, pak choi and lambs lettuce, planted on 13th of April. I have also transplanted two broad bean plants in the hope that their nitrogen fixing abilities will help my leafy plants.


Thursday, 24 April 2014

My Garden: 24th April 2014

I massacred my brassica seedlings. I planted a mix of purple sprouting broccoli, calabrese and cabbage indoors in early March and they were looking well for a while:


Unfortunately even though indoor sowing is great for sprouting seeds, it is quite difficult to maintain seedling health as the soil dries out quickly. The only window sill I had available was the sitting room, and it was still stove lighting weather so my seedlings perished in the dry heat:


Doh.

But there is still time! Not deterred by my failures, I planted a new batch of seedlings, even better than the first! They remain outside in boxes that I can cover at night. I am making an effort to shade them when the sun is strong. Honestly sometimes I think it works better when seeds are sown outside and you just leave the rain and sun do their work. In the words of Queen, too much love will kill you[r brassica seedlings].


In other news I took a shovel to the compost bin and what started off as disgusting bits of rotting food, egg cartons, toilet rolls and leaves, is now more attractive and usable:


My comfrey plant which had died back for the winter is full of growth so I've started a batch of fertiliser:


My broad beans have gone out to the big bad world, and I've planted mange tout around them, plus some sweet pea flowers to attract the pollinators.


Wednesday, 16 April 2014

Make Your Own Marinara Sauce

Ideally my homemade marinara sauce would be made in season from a glut of home grown tomatoes but we just do not get the climate to encourage a bumper tomato crop so cheap Lidl cherry tomatoes it is.

First I drizzled olive oil and balsamic vinegar over a head of garlic split into cloves, a large onion and 1.5 kg of cherry tomatoes. I added a pinch of sea salt, sugar and dried oregano plus some fresh basil and oven roasted the whole lot at gas 4 for about 45 minutes.


The roasted veg were blended until liquid, but still lumpy, and married with meatballs and spaghetti for a hearty meal.


This sauce will freeze well. I just cooled and poured into a zip lock freezer bag.

Tuesday, 15 April 2014

Eat Your Weeds!

We all have those tiny ambitions, little dreams that would be easy to fulfill but other things keep getting in the way. For some it might be to complete in a triathlon...for me, it's to eat nettles. I have no excuse, they grow in my back garden, but it's taken years of thinking about it for me to finally do it. And today was that day. As per foraging guidelines, I snipped the young tips from the plants. Nettles should be eaten young, and definitely before the plant flowers as growth at this stage can be damaging to the kidneys.


The nutritional benefits of nettles include iron and vitamin C.
I washed the nettles and gently sweated in a pot with some butter. 


To compliment the dish, I pulled a very young garlic plant and chopped it into the pot. Even though I was full sure that cooking removes the sting, that first taste was nerve racking! I was rewarded with a delicious spinach tasting, textured but soft mouthful. It's not a great photo, sorry.


So I can confirm that nettle eating is not just foraging play but a viable side dish to complete with any other green leaf you might buy in a shop.

Wednesday, 26 March 2014

Lifting Tulip Bulbs

I am not much of a flower gardener. If you looked at my front (north facing) garden, you wouldn't imagine for a second that I had enough interest in gardening to write a blog about it. I don't buy in much plants and prefer to set random bulbs and seeds, just to see what happens. It's hit and miss. Like many people, I love my bulbs like tulips, daffodils, dahlias and hyacinths. My first year growing tulips gave me a magnificent border of reds, oranges, yellows, pinks and deep purples. In fact, the Google street view image of our house was taken when they were in full bloom. It was a stroke of luck because the garden has never looked as good since. The next year only half the bulbs flowered and they were all yellow. 


Unlike daffodils which spread and seem to get stronger each year (although I have read that the bulbs should be lifted and stored every five years), tulips benefit hugely if you dig them up every year, once flowering has ended and the stalks are browning, and store them in a warm, dry place until planting season comes around again.


Last year, I took up some random bulbs that I found by accident when digging around the garden and left them in the greenhouse all summer and autumn. I didn't even do it on purpose, just threw them in there. When the planting season came, I planted them in pots - narcissuses, hyacinths and one tulip. Out of all the tulip bulbs in my garden, the potted one is the only one that is set to bloom:


All others look like this (the mottled thick green stalks):


And this:


Even though it is early to lift the bulbs, I couldn't wait. I knew if I didn't do it then (yesterday), I would let it go by the wayside and have the same problem next year. So I got on my knees and carefully prised them from their hiding places. Most of the bulbs had formed new tiny bulblets. I left the leaves attached as best I could so they can naturally die back.


I'll lay them out on newspaper until dry and once the stalks have browned, I'll store in a cardboard box until next Autumn when they will be planted out again.

Tuesday, 25 March 2014

Growing Leeks in Ireland

This is my first year growing leeks and I want to make a passionate effort to succeed. There is some effort required and the seed packet instructions fall a bit short of directing you towards a decent crop. Leeks can be sown in situ but sowing in a seed bed/module is preferable as it allows deep planting.

There are a few stages involved:

Stage 1: Sowing the seed


Normally from March-April. Plant your seed in modules (I am using empty toilet rolls) of moist compost. A depth of 1cm is commonly advised. I have also been told that seeds should be covered by a layer matching their own depth. Keep the soil moist. A mild place is suitable for the seedlings (10-15˚F).


Stage 2: Planting Out

This occurs about two months after planting, when leeks are pencil-thick and about 8 inches long.

Leeks are hungry so plant out in prepared ground that has been fertilised (e.g. manure/compost). Using a dibber (or a twig found on the ground if you are me!), make a hole about 6 inches deep. Place the leek in the hole and fill up with water, not soil.


Stage 3: Earthing Up


The reason the planting hole is filled with water, not soil, is to allow the leek to be covered gradually. This will happen naturally as soil is washed into the water, slowly taking over. Once the hole is filled, the stems must be gradually earthed up further - say a layer of soil/organic matter once a week. This process of slowly covering the leek is to achieve the white (blanched) stem, which we all know is the best part and makes the vegetable look so magnificent. Try to build the soil up by dragging it from all sides to surround the leek, rather than shovelling it on, as it may get inside the layers of the vegetable.


The leek is a slow maturing crop and most varieties will withstand extreme weather to stay in the soil all winter. Healthy plants require ample spacing of about 9 inches each way.


Stage 4: Harvesting and Eating!


As you can see, the stem is nicely blanched with a lot of white. My earthing up paid off.


Depending on sowing times and varieties, your crop will be ready to enjoy from early winter. I eat leek mostly in a casserole with chicken and sausages, or in soup. If you have any better suggestions, please leave a comment!


Wednesday, 19 March 2014

Leggy Seedlings


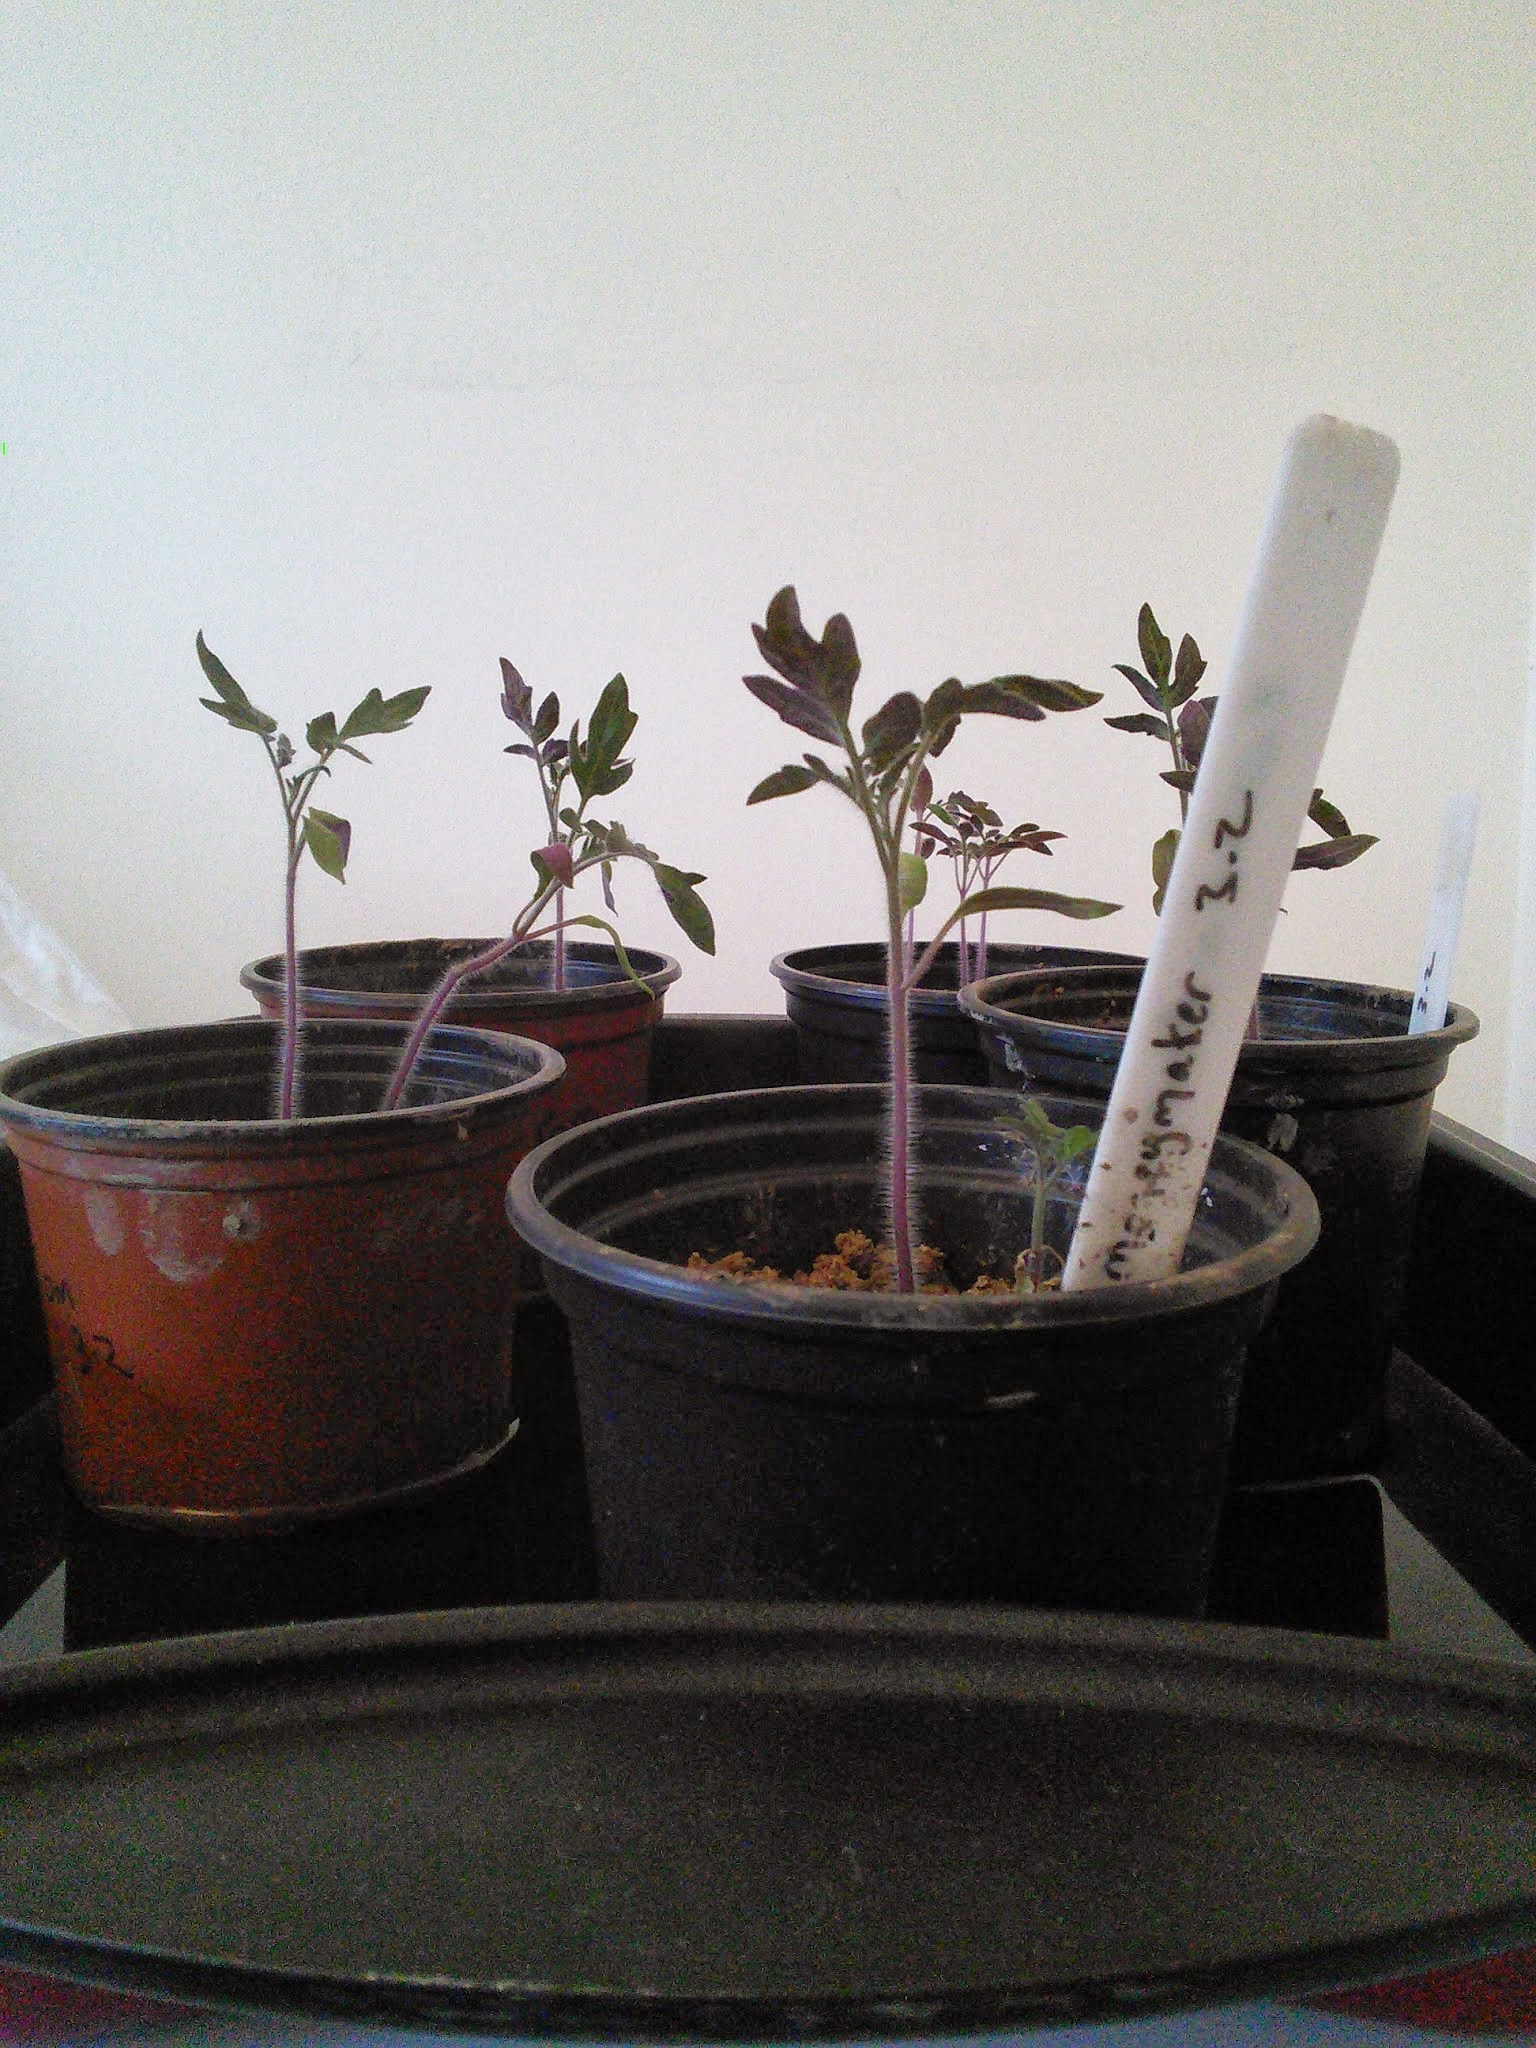
If, like my tomato plants, your seedlings are a bit elongated, it can be rectified somewhat at the potting on stage. Bury the stems deep covering the seedlings up to their leaves and help them get some strength back.

Reasons for leggy seedlings/plants


1. Insufficient light

Indoor sowings are particularly susceptible to a lack of light as they can usually only get it from one direction and strain themselves towards the source. Regular rotating of plants will help with this problem.

2. Over-fertilisation

An imbalance of nutrients, particularly high Nitrogen levels, will result in too much green growth and a lack of flowers. Potassium and Phosphorous encourage fruit and flower development.

3. Incorrect Potting Technique

I am guilty of this and it only dawned on me this year, after many of my seeds had been planted. I am by no stretch an experienced gardener but this is my third year dabbling and I am still making rookie mistakes that seem so obvious once I realise them.

Instead of using seed trays with tiny modules, I often plant seeds directly into large pots. My logic was that (a) it would reduce the amount of times the plant would have to be potted on and (b) the seed would have plenty room and nutrients because it had no competition. I was wrong, oh so wrong.

The reason for starting seeds in small pots/modules and potting on in stages is:

(a) It promotes good root development. It is when the root hits a barrier (the pot base) that it develops from a long tap root into a fibrous one, sending out branches. This strengthens the root. By planting my seeds in a big pot, the root was just growing straight down, making no attempt to build itself up.

(b) Using large pots causes the soil to become anerobic and lack oxygen. Following on from poor root development, lack of activity in the soil (assuming there are no earthworms in the pots) causes conditions to become stagnant. This does not entice healthy plant development. Increasing pot size as the plant grows is the best practice.


Just look at my poor purple sprouting broccoli! Let them be a lesson to you.